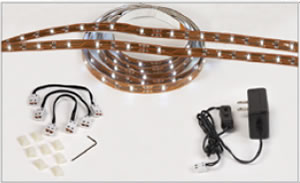
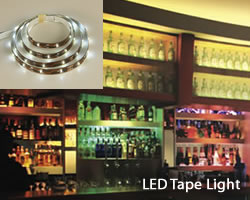
InvisiLED Palette & Aura Daylight to Sunset
- Always turn off power at fuse box prior to installation to prevent electrical shock.
- Intended for indoor use. Dry and damp locations.
- For installation by a qualified electrician.
- System is intended for installation in accordance with National Electric Code, and local regulations.
- Consult with local inspector to assure compliance.
InvisiLED Palette & Aura Daylight to Sunset Tape Lights have polarity for connection.
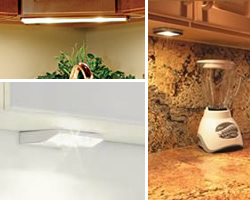
If a.5" x.5" or greater cove or channel is not built-in, a Retrofit Channel may be necessary to conceal the tape lights or provide an extended surface for mounting or directing the light.
Wiring and Installation:
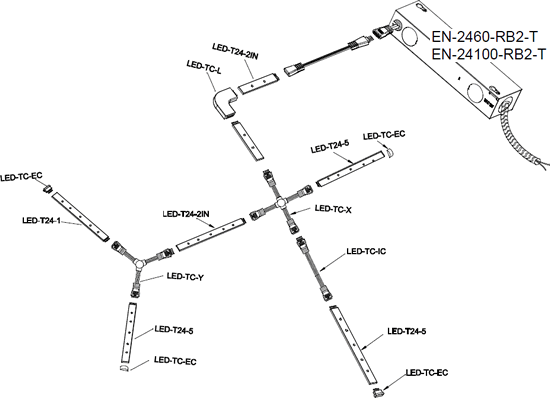
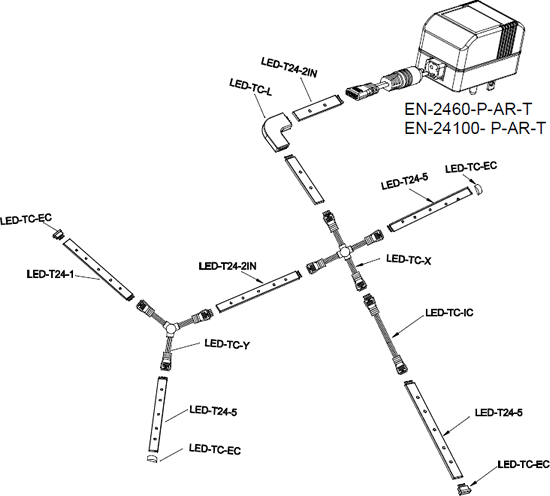
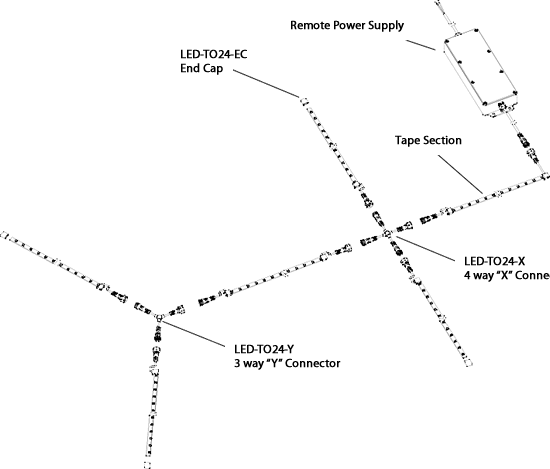
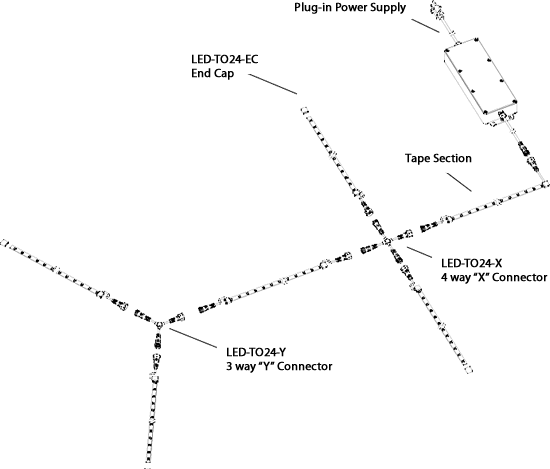
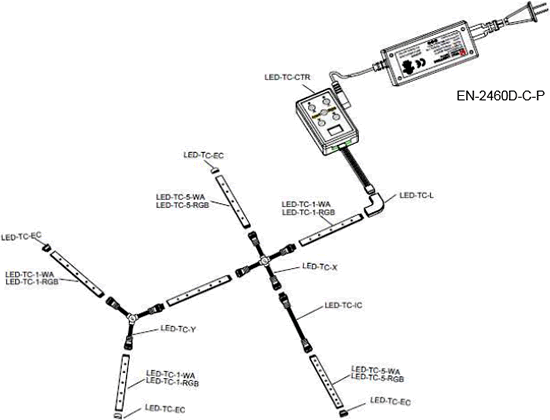
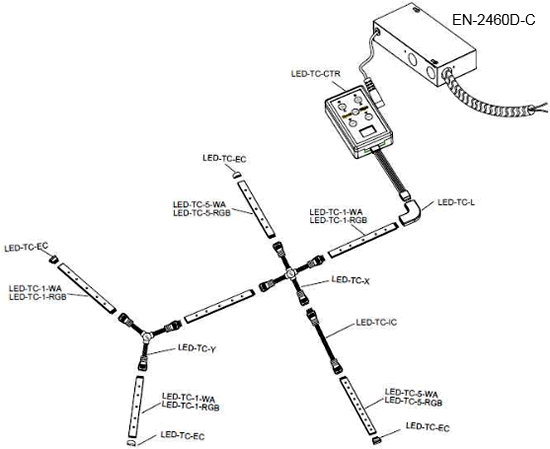
Refer to installation diagram.
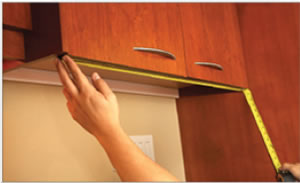
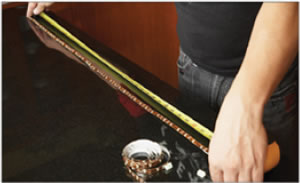
1. Determine the number of separately powered runs needed. Calculate the number of power supplies.
| Min. / max. run length |
6 inch / 40 ft per run |
| Current |
100 mA/ft |
| Power consumption |
1.5 Watts/ft |
2. Measure the length of each run and round it off to the nearest 6-inch interval. Determine the necessary quantities of 1-ft, 5-ft.
3. Count the number of turns in the runs.
4. If making lateral turns at angles other than 90°, determine the number of joiner cables necessary to make the lateral angles.
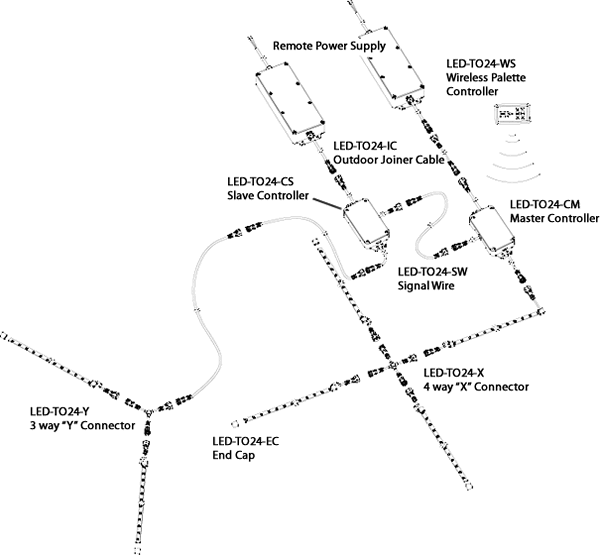
5. Connect the DC power supply to incoming 120V supply.
Hard Wire (above)
- DC power supply must be installed away from heat sources and accessible for service
- Enclosed DC power supply is UL listed. The power supply box has a separate line volt, and low volt wiring compartments. Trade size knock outs are provided on both compartments.
- Connect building wires to like color DC power supply wires with wire nuts. Building ground wire may be green or un-insulated, and attaches to green wire from DC power supply box.
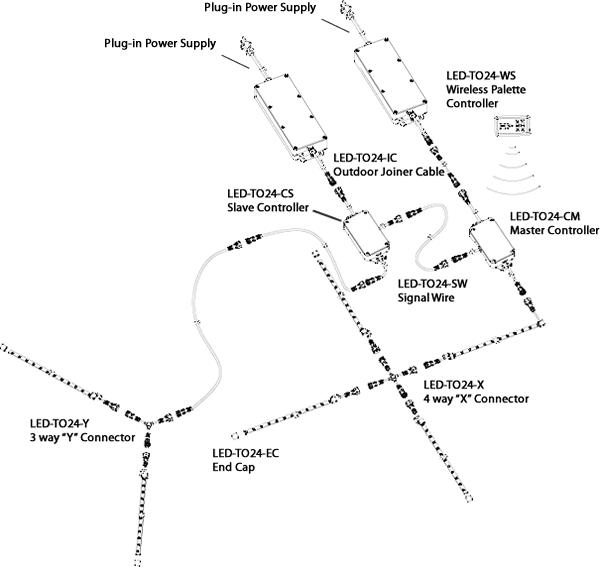
Plug-in (below)
- 24 Volts DC power supply plugs into standard 120 Volts 3 prong grounded outlet
- Power supply must be installed away from heat sources
- Class II output splices do not require enclosures
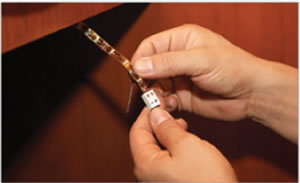
6. Connect the output of the DC power supply with the WAC controller, then connect the 5 pins female connector of the controller to the 5 pins male connector of the InvisiLED tape, to form straight lines or bend lengthwise around the installation surface.
7. Connect remaining sections using 1-ft and 5-ft sections of tape light or connectors.
6inch LED sections may be cut where indicated at the end of the run only.
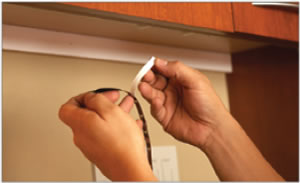
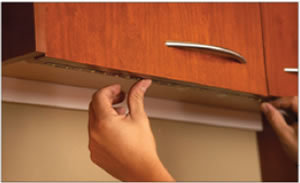
8. On smooth surfaces, the included adhesive is sufficient in most applications. However if mounting surface is a porous or textured surface, then use a Mounting Clip every 6" to reinforce the installation.
9. Terminate each separately powered run with an end cap. Cut end caps or male end caps are the available choices for cut or uncut sections respectively.
WAC Lighting InvisiLED Daylight to Sunset: Color Changing
Change the ambiance and color scheme
of your exterior space at the touch of a button. Daylight to Sunset offers the unique ability to change the atmospher of any interior space with the push of a button. Relax as the light segues from cool white to warm amber, mimicking the suns gentle passage through the sky. Versatile enough to suit residential needs
for home accent illumination with holiday flair as well as large commercial venues
for various event functions that require a DMX link to professional control systems.
Maximum run of 40'.
WAC Lighting InvisiLED Pallette: Color Changing
Change the ambiance and color scheme
of your exterior space at the touch of a button. Versatile enough to suit residential needs
for home accent illumination with holiday flair as well as large commercial venues
for various event functions that require a DMX link to professional control systems.
Maximum run of 40'