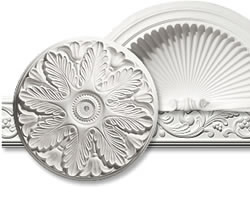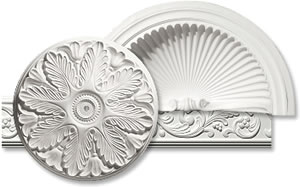
Architectural Details
Create mystique within a room by changing the very shape and feel with a curved dome or decorative dome center.
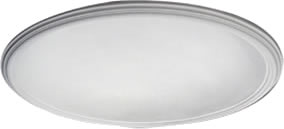
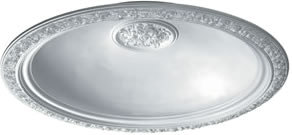
Surface Mount Ceiling Domes
Surface mounted domes create an optical illusion of a recess without cutting into the ceiling.
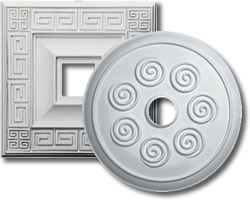
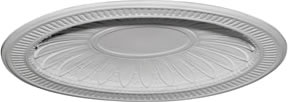
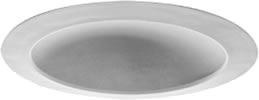
Recess Mount Ceiling Domes
Recessed domes increase the height of a room and allow for larger chandelier. Domes and dome centers replace traditional tray ceilings - at a much lower product and installation cost.
Center medallions, where shown, are sold separately.
Domes are manufactured as one piece. Dome name is based on rim design. Coordinating ceiling medallions have the same name.
Basic Installation: instructions are at the bottom of this page.
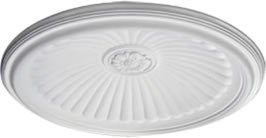
Ekena Millworks DOME 158836 Dome
Ekena Millworks DOME28AS Ashford Surface Mount Ceiling Dome on Amazon
28.875" Outside Diameter
4.25" P Ashford Surface Mount Ceiling Dome
Material: Urethane
Ekena Millworks DOME 158843 Dome
Ekena Millworks DOME34BE Bedford Surface Mount Ceiling Dome on Amazon
34.5" Outside Diameter
4" P Bedford Surface Mount Ceiling Dome
Material: Urethane
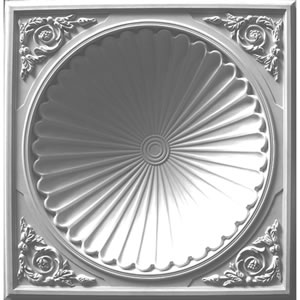
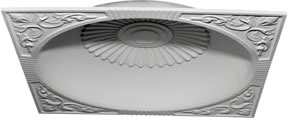
Ekena Millworks DOME DOME28TR/172092 Dome
Ekena Millworks DOME28TR Traditional Surface Mount Ceiling Dome on Amazon
28" Outside Diameter
5" P, Traditional Ceiling Dome, 2.75" W Trim
Material: Urethane

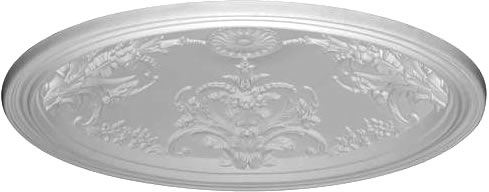
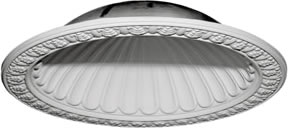
Ekena Millworks DOME47AN Dome
Ekena Millworks DOME47AN Andrea Surface Mount Ceiling Dome on Amazon
47.5" Outside Diameter
8.63" P, Traditional Ceiling Dome, 8.63" W Trim
Material: Urethane
Dome is circular.

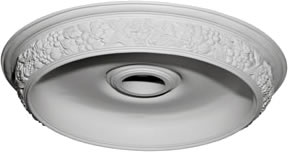
Ekena Millworks DOME DOME46BE / 172094 Dome
Ekena Millworks DOME46BE Benson Surface Mount Ceiling Dome on Amazon
45 5/8" Outside Diameter
9.25" P, Benson Ceiling Dome, 3.125" W Trim
Material: Urethane
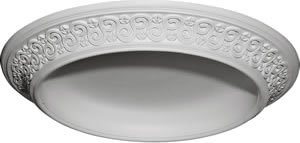
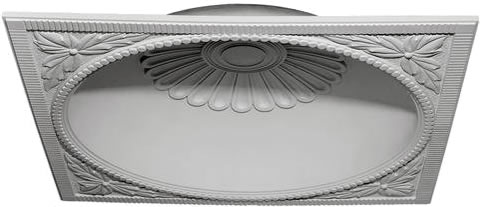
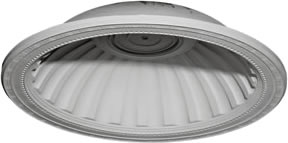
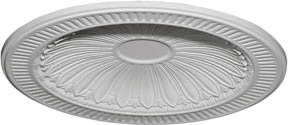
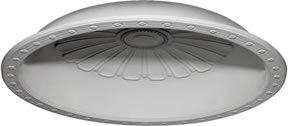
Ekena Millworks DOME 170088 Dome
Ekena Millworks DOME38OD Odessa Recessed Mount Ceiling Dome on Amazon
DOME 170088
38.5" wide x 38.5" high x 30.75" ID x 7.875" D Odessa Recessed Mount Ceiling Dome
Material: Urethane
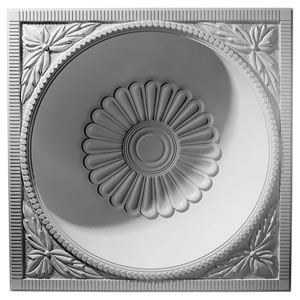
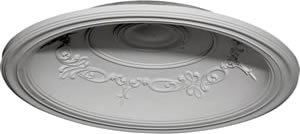
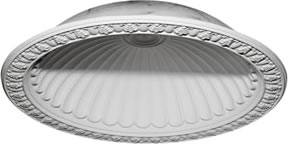
Ekena Millworks DOME DOME47CL / 153131 Dome
Ekena Millworks DOME47CL Claremont Recessed Mount Ceiling Dome on Amazon
47 3/8" Outside Diameter
38 3/8" ID x 12" D Claremont Recessed Mount Ceiling Dome
Material: Urethane
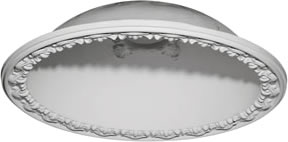
Ekena Millworks DOME DOME47SA / 158929 Dome
Ekena Millworks DOME47SA Salem Recessed Mount Ceiling Dome on Amazon
47.125" Outside Diameter
39.25" ID x 9 3/8" D Salem Recessed Mount Ceiling Dome
Material: Urethane
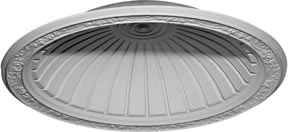
Ekena Millworks DOME 152912 Dome
Ekena Millworks DOME26DU Dublin Recessed Mount Ceiling Dome on Amazon
26.875" Outside Diameter
25" ID x 3.875" D Dublin Recessed Mount Ceiling Dome
Material: Urethane
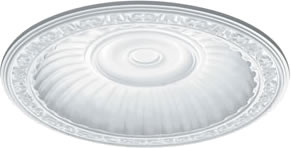
Ekena Millworks DOME 158926 Dome
Ekena Millworks DOME31MI Milton Recessed Mount Ceiling Dome on Amazon
31.875" Outside Diameter
25.125" ID x 7 3/8" D Milton Recessed Mount Ceiling Dome
Material: Urethane
Ekena Millworks DOME 171922 Dome
Ekena Millworks DOME32NE Nexus Recessed Mount Ceiling Dome on Amazon
32.25" Outside Diameter
26" ID x 3.75" D Nexus Ceiling Recessed Mount Dome
Material: Urethane
Ekena Millworks DOME 153041 Dome
Ekena Millworks DOME35DE Devon Recessed Mount Ceiling Dome on Amazon
35 3/8" Outside Diameter
27.5" ID x 3.875" D Devon Recessed Mount Ceiling Dome
Material: Urethane
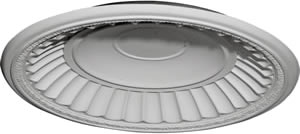
Ekena Millworks DOME 158927 Dome
Ekena Millworks DOME35CH Chesterfield Recessed Mount Ceiling Dome on Amazon
35" Outside Diameter
27.875" ID x 6 5/8" P Chesterfield Recessed Mount Ceiling Dome
Material: Urethane
Ekena Millworks DOME 153050 Dome
Ekena Millworks DOME39HI Hillock Recessed Mount Ceiling Dome on Amazon
39.5" Outside Diameter
32" ID x 10 3/8" D Hillock Recessed Mount Ceiling Dome
Material: Urethane
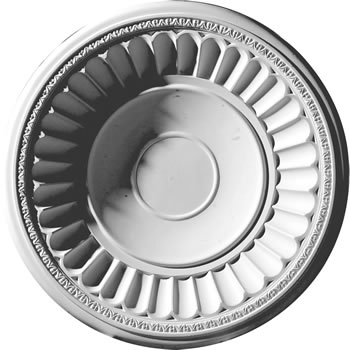
Ekena Millworks DOME 158925 Dome
Ekena Millworks DOME42HA Hamilton Recessed Mount Ceiling Dome on Amazon
42.875" Outside Diameter
35 3/8" ID x 9.75" D Hamilton Recessed Mount Ceiling Dome
Material: Urethane
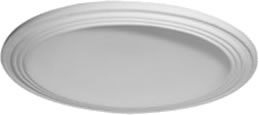
Ekena Millworks DOME 172113 Dome
Ekena Millworks DOME44SM Smooth Recessed Mount Ceiling Dome on Amazon
44" Outside Diameter
9" P, Smooth Ceiling Dome, 2.5" W Trim
Material: Urethane
Ekena Millworks DOME 153360 Dome
Ekena Millworks Devon Recessed Mount Ceiling Domes on Amazon
44" wide x 35.75" ID x 3.875" D Devon Recessed Mount Ceiling Dome
Material: Urethane
Ekena Millworks DOME158928 Dome
Ekena Millworks Bedford Recessed Mount Ceiling Domes on Amazon
53.875" Outside Diameter
46" ID x 10 5/8" D Bedford Recessed Mount Ceiling Dome
Material: Urethane
Ekena Millworks DOME 153246 Dome
Ekena Millworks Claremont Recessed Mount Ceiling Domes on Amazon
60.75" Outside Diameter
50.125" ID x 15.125" D Claremont Recessed Mount Ceiling Dome
Material: Urethane
Preparing the Ceiling
Invert dome and trace on ceiling.
For domes with rims, measure and mark the distance from the edge of the domes rim to the beginning of the curve. This is the cut line.
For rimless domes, the tracing line is the cut line.
Cutting the Rough Opening
Frame and Wallboard Construction: Cut wallboard and remove necessary sections of joist. Add as needed for support (figures 1 & 2):
1 framing members, 2 x double members on each side and perpendicular to ceiling joist, 3 x over the top to hold electrical box.
Lay-in or Suspended Ceilings: Cut acoustical tiles and metal framework. (figure 3). When in place, tiles will rest on the edge of the dome and framework.
Preparing the Dome
Lightly sand dome surface.
Fiberglass domes: drill hole for light fixture if needed:
Polyurethane Domes can be drilled from the front side.
Frame and Wallboard Construction
Fiberglass Domes: Thread construction wire through metal straps on back of dome. Attach wires tightly to the overhead joist using screws (figure 4). Note: If you choose to drill through the dome, refill holes with Bondo then sand, or use fiberglass repair kit.
Polyurethane Domes: Insert screws through dome into wallboard or framing. Dome can be glued to ceiling using Focal Point Adhesive #33333.
Lay-in or Suspended Ceilings
Fiberglass Domes: Thread construction wire through straps; attach wires to suspended ceiling wires.
Polyurethane Domes: Use a wood block, into which the suspension wires are secured. Screw from the inside of the dome through the wood block that is positioned on the topside of the dome (figures 4 & 5). Note: Light fixture is supported by the framing, not by the dome.
Final Touch-Up
Sand surface of dome; paint with high quality paint. Do Not use lacquer paints.
Caulk where dome meets the ceiling.
Ekena Millworks DOME 172093 Dome
44" Outside Diameter
8.875" P, Edwards Ceiling Dome, 3.5" W Trim
Material: Urethane
Ekena Millworks DOME 158930 Dome
59" Outside Diameter
51.125" ID x 10" D Sussex Recessed Mount Ceiling Dome
Material: Urethane
Ekena Millworks DOME DOME57VA/172129 Dome
57" Outside Diameter
8.875" P, Vaduz Ceiling Dome, Trim 3.75" wide
Material: Urethane
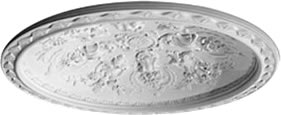
Ekena Millworks DOME 171992 Dome
59" Outside Diameter
51.125" ID 11"
Floral Recessed Mount Ceiling Dome
Material: Urethane
Ekena Millworks DOME38AR 172096 Dome
38 5/8" Outside Diameter
7" P, Artisan Ceiling Dome, 1 3/8" W Trim
Material: Urethane

design42 New Media Web Design
2192 Dartmouth Rd
Hendersonville NC 28791