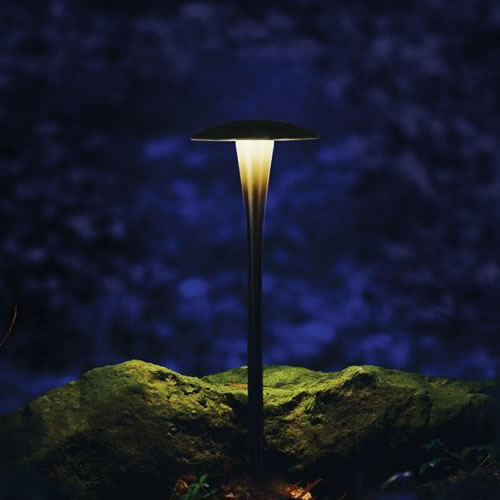
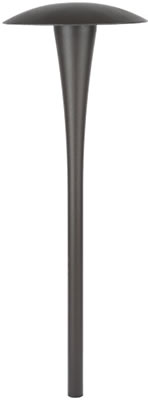
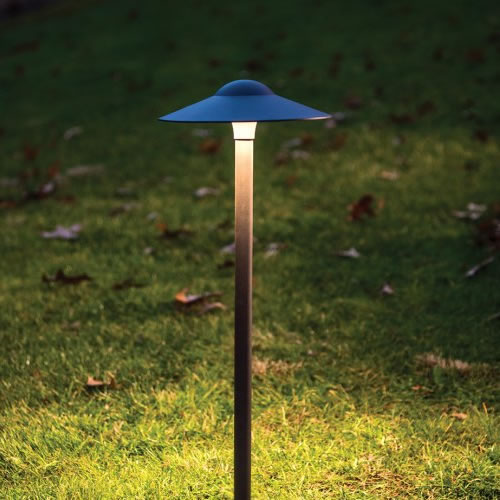
WAC Lighting 6011 AREA Path Light
WAC Lighting 6011 AREA Path Lights on Amazon
IP66 rated, Protected against powerful water jets
Factory sealed water tight fixtures
Solid brass or corrosion resistant aluminum alloy
Constant output for 9V-15V input
Mounting stake, 6 foot lead wire, and direct burial gel filled wire nuts included
Models:
6011-27BBR 2700K Warm White Bronze on Brass
6011-27BZ 2700K Warm White Bronze on Aluminum
6011-27BK 2700K Warm White Black on Aluminum
6011-30BBR 3000K Pure White Bronze on Brass
6011-30BZ 3000K Pure White Bronze on Aluminum
6011-30BK 3000K Pure White Black on Aluminum
Mounting Accessories
(included in box)
*Note: Transformer is required to power the fixture. (sold separately)

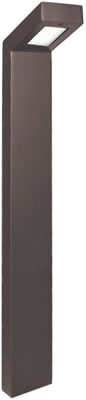
WAC Lighting 6041 TIKI Path Light
WAC Lighting 6041 TIKI Path Lights on Amazon
IP66 rated, Protected against powerful water jets
Factory sealed water tight fixtures
Solid brass or corrosion resistant aluminum alloy
Constant output for 9V-15V input
Sleek linear design works well in applications where directional illumination is desired
Recommended spacing for installation: Residential: 7 to 9ft; Commercial: 5 to 7ft
Mounting stake, 6 foot lead wire, and direct burial gel filled wire nuts included
Models:
6041-27BBR 2700K Warm White Bronze on Brass
6041-27BZ 2700K Warm White Bronze on Aluminum
6041-27BK 2700K Warm White Black on Aluminum
6041-30BBR 3000K Pure White Bronze on Brass
6041-30BZ 3000K Pure White Bronze on Aluminum
6041-30BK 3000K Pure White Black on Aluminum
Mounting Accessories
(included in box)
*Note: Transformer is required to power the fixture. (sold separately)

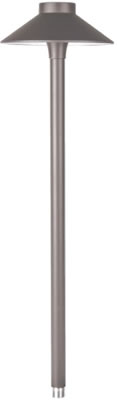
WAC Lighting 6051 CANOPY Path Light
WAC Lighting 6051 CANOPY Path Lights on Amazon
IP66 rated, Protected against powerful water jets
Factory sealed water tight fixtures
Solid brass or corrosion resistant aluminum alloy
Constant output for 9V-15V input
Sturdy side mount design works well in applications where directional illumination is desired
Recommended spacing for installation: Residential: 7 to 9ft; Commercial: 5 to 7ft
Mounting stake, 6 foot lead wire, and direct burial gel filled wire nuts included
Models:
6051-27BBR 2700K Warm White Bronze on Brass
6051-27BZ 2700K Warm White Bronze on Aluminum
6051-27BK 2700K Warm White Black on Aluminum
6051-30BBR 3000K Pure White Bronze on Brass
6051-30BZ 3000K Pure White Bronze on Aluminum
6051-30BK 3000K Pure White Black on Aluminum
Mounting Accessories
(included in box)
*Note: Transformer is required to power the fixture. (sold separately)

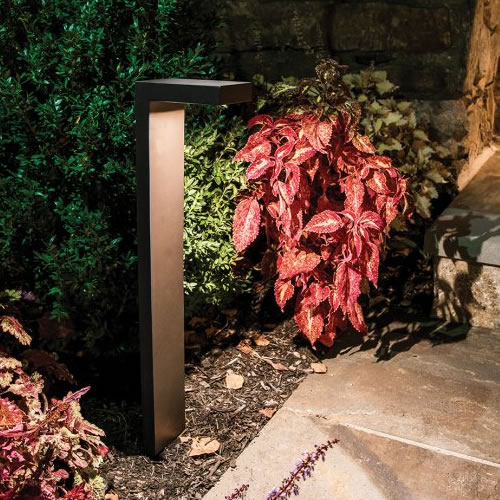
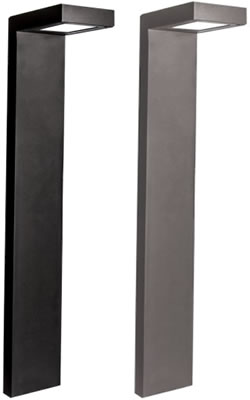
WAC Lighting 6021 LINEAR Path Light
WAC Lighting 6021 LINEAR Path Lights on Amazon
Input: 9-15VAC
Power: 2.9W / 4.7VA
Brightness: 95lm
CRI: 90
Rated Life: 60,000 hours
IP66 rated, Protected against powerful water jets
Factory sealed water tight fixtures
Constant output for 9V-15V input
Sleek linear design blends seamlessly into pathways while providing soft, even illumination
Recommended spacing for installation: Residential: 7 to 9ft; Commercial: 4 to 6ft
Models:
6021-27BZ 2700K Warm White Bronze on Aluminum
6021-27BK 2700K Warm White Black on Aluminum
6021-30BZ 3000K Pure White Bronze on Aluminum
6021-30BK 3000K Pure White Black on Aluminum
Mounting Accessories
(included in box)
*Note: Transformer is required to power the fixture. (sold separately)
WAC Lighting 6081 LEDGE Path Light
WAC Lighting 6081 LEDGE Path Lights on Amazon
Input: 9-15VAC
Power: 3.0W / 4.5VA
Brightness: Up to 105lm
CRI: 90
Rated Life: 60,000 hours
IP66 rated, Protected against powerful water jets
Factory sealed water tight fixtures
Constant output for 9V-15V input
Sleek linear design blends seamlessly into pathways while providing soft, even illumination
Recommended spacing for installation: Residential: 8 to 10ft; Commercial: 5 to 7ft
Mounting stake, 6 foot lead wire, and direct burial gel filled wire nuts included
Models:
6081-27BZ 2700K Warm White Bronze on Aluminum
6081-27BK 2700K Warm White Black on Aluminum
6081-30BZ 3000K Pure White Bronze on Aluminum
6081-30BK 3000K Pure White Black on Aluminum
Mounting Accessories
(included in box)
*Note: Transformer is required to power the fixture. (sold separately)
NEVER attempt any work without shutting off the electricity.
Read all instructions before installing.
System is intended for installation by a qualified electrician in accordance with the National Electrical Code and local regulations.
Place the wall switch in the "OFF" position.
Go to the main fuse box, or circuit breaker. Unscrew the fuse(s) or switch "OFF" the circuit breaker switch(es) that control the power to the space that you are working on.
WARNING: Risk of electric shock. Install all luminaires 10 feet (3.05 m) or more from a pool, spa, or fountain.
CAUTION: All parts must be used as indicated in these instructions. Do not substitute any parts, leave parts out, or use any parts that are worn out or broken. Failure to follow this instruction could invalidate the ETL/cETL listing of this fixture.
STEP 1:
1. Make sure your main power is off.
2. At the point of installation, mount the stake by placing a piece of wood on the stake and hammering the wood. Hammer till the bottom of the ring is flush with the ground.
3. In the case of hard soil, dig a hole and place the stake in so that the bottom of the ring is flush with the ground. Fill the rest of the hole with the removed soil and pack it tight to secure the stake.
4. Screw the fixture onto the stake provided, leading the wire from the fixture through the wire slot in the stake.
STEP 2:
5. Cut the power supply wire from the transformer at the location of the fixture.
6. Separate the power supply wire into two individual wires by lightly pulling on each side so that a couple inches is separated.
7. Strip off ½ inch of the insulating material from each wire and connect one to each of the wires from the fixture using the outdoor rated direct burial wire nuts provided.
STEP 3:
8. Screw the fixture onto the stake provided, leading the wire from the fixture through the wire slot in the stake.
9. If desired, bury your wire by digging a small trench. Close the trench by applying an inward force to both sides of the trench.
10. Repeat steps for other fixtures in the same electrical circuit.
11. Turn the main power supply back on and make sure the fixtures light up.
1. Attach the three removable spikes to the surface mount accessory by screwing them in.
2. Using a piece of wood to buffer the impact, hammer the assembled mount into the soil till the bottom of the surface mount accessory is flush with the ground.
3. Lead your wire through the wire slot and screw in your fixture.
4. Connect fixture wires to power supply wires as normal using the outdoor rated direct burial wire nuts provided.
1. Mount the accessory to the surface using No. 10 Philips head screws that are at least half an inch long.
2. If mounting on concrete or something similar, first use plastic anchors sized for No. 10 screws.
3. Create a route underneath the accessory for your wire to travel through.
4. Lead your wire through the created route and screw your fixture onto the surface mount accessory.
Thread the fixture cap into the stem body by rotating it clockwise.

design42 New Media Web Design
2192 Dartmouth Rd
Hendersonville NC 28791